
Thirsty? You’re probably pretty used to just turning on the tap. But three incidents from last month remind us that taking our water for granted can land us in serious hot…well, water. In
Winnipeg, tests came up positive for E. Coli in parts of the city’s water supply. That same week, a diesel spill in
Lewisburg, West Virginia, shut down the city’s water system in an effort to prevent widespread supply contamination. And in Bladensburg, Maryland, an underground water pipe split, causing a sinkhole large enough to flood homes and swallow cars.
Solutions to these problems ranged from a mayor appearing on YouTube and advising his citizens to boil their water, to a local restaurateur deciding, “We are going to limit our menu frankly to things that don’t require very much water.”
Water purification and filtration should definitely be a priority, when it comes to emergency preparedness (check out our water filters and purification systems
here!). And it wouldn’t hurt to have a repertoire of meals that don’t require boiling water (
MREs, anyone?). But one standard prepper practice would make life considerably easier in a similar disaster.
That’s right. I’m talking water storage.
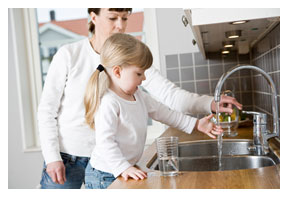
If that tap that you turn on a hundred times a day still works, then storing water can be easy and free. Just be sure that you follow credible recommendations to make sure the water you store is safe to use. Both the
CDC and
Ready.gov provide handy tip sheets on water storage. Here are a few of considerations highlighted there:
How much water should I store?
- The recommended amount is a gallon of water per person per day. Keep in mind that some factors may require storing more (hot weather, children or nursing mothers, etc.), and don’t forget to figure pets into your calculations!
- To go along with your 72-hour emergency supply kit, plan on storing at least three days worth of water for each person in your home.
 How should I store it?
- Commercially purchased and sealed water supplies, like our cans and pouches, are the best way to store water, hands down.
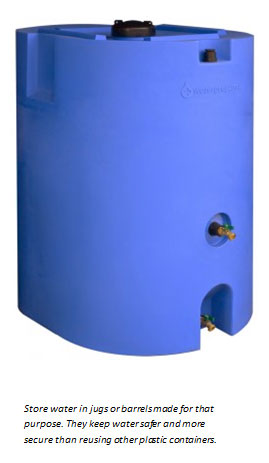
- To supplement store bought water, you can also store your own tap water in clean containers. Don’t use empty milk jugs, fruit juice containers, or anything that ever contained chemicals. Do use two liter soda bottles or dedicated water jugs and barrels.
- Wash used containers with soap, sanitize with diluted bleach, and let them dry completely before filling them.
What should I do with my stored water?
- Keep purification tablets, like our Katadyn Micropur purification tablets, on hand, especially if the bottles haven’t been bleached.
- Label the bottles clearly with the date and “drinking water.”
- Store somewhere away from light and high temperatures.
- Rotate stored tap water every six months.
Of course, we hope that the tap keeps working the way it’s supposed to. But it’s a smart idea to prepare for every contingency. Let us know how you’re doing on your water storage!

5 comments
Alexa Bartel
Thank you for this informative post. We definitely take our water for granted. I never thought to store my water supply, and I liked that you added storing water for pets to the equation.
Bob
I have asked several times, “How do you recommend cleaning the 160 gal tanks if filled for an emergency, but not used?” Your refusal to respond speaks loudly to your sales practices.
Terry Jeanette
Thanks for the cleaning instructions for larger containers. Not knowing how to clean them later had kept me from using the big ones. Now I feel confident and will go ahead and use them in addition to the smaller bottles. That way we’re covered for staying at home or needing to evacuate. Thanks also for all of your helpful information as well as providing us with a place to buy these supplies.
Emergency Essentials
Hey Bob,
I’m sorry we haven’t responded to your concern. This is the first time I’ve seen your question. I did a lot of searching to find the best way to clean one of those large tanks, and this is what I found.
Step 1: Drain the water. You can still use this water for watering the lawn, plants, and other things.
Step 2: Mix dish soap and clean water into the water tank. You’ll want to swish the water around in the container so the soap and water mixture touches all the walls of the tank. In order to do this, you won’t want to put in too much water, as the tank will get very heavy otherwise.
Step 3: Thoroughly rinse the water tank several times with clean tap water to remove any soap residue.
Step 4: Mix a solution of 4 cups water and 1 tablespoon of chlorine bleach (with 5.25% – 6% sodium hypochlorite as an active ingredient) for every gallon of water your storage container holds. So, if my math is correct, you will need 460 cups of water (about 28 gallons) and half a gallon of chlorine bleach. Be sure not to use scented or “color safe” bleach products. Liquid bleach loses strength over time.
Step 5: Pour this solution into the container, close the opening, and now you’ll probably have to roll the tank around so it can rinse everything out. Let the solution sit in the bottom of the tank for at least half an hour. If you have other containers, you can then use this same solution to clean the others.
Step 6: Rinse the container well with clean tap water (you may have to rinse it a few times).
And that should do it! These tanks are large and can be a pain to clean, but if you need to, this is one way to go about it. There could be other ways, but this is what I found works the best. Good luck in your cleaning efforts!
Deborah
You sell water storage items. You need to sell water testing kits to check for bacteria in the water. A safer way to drink it