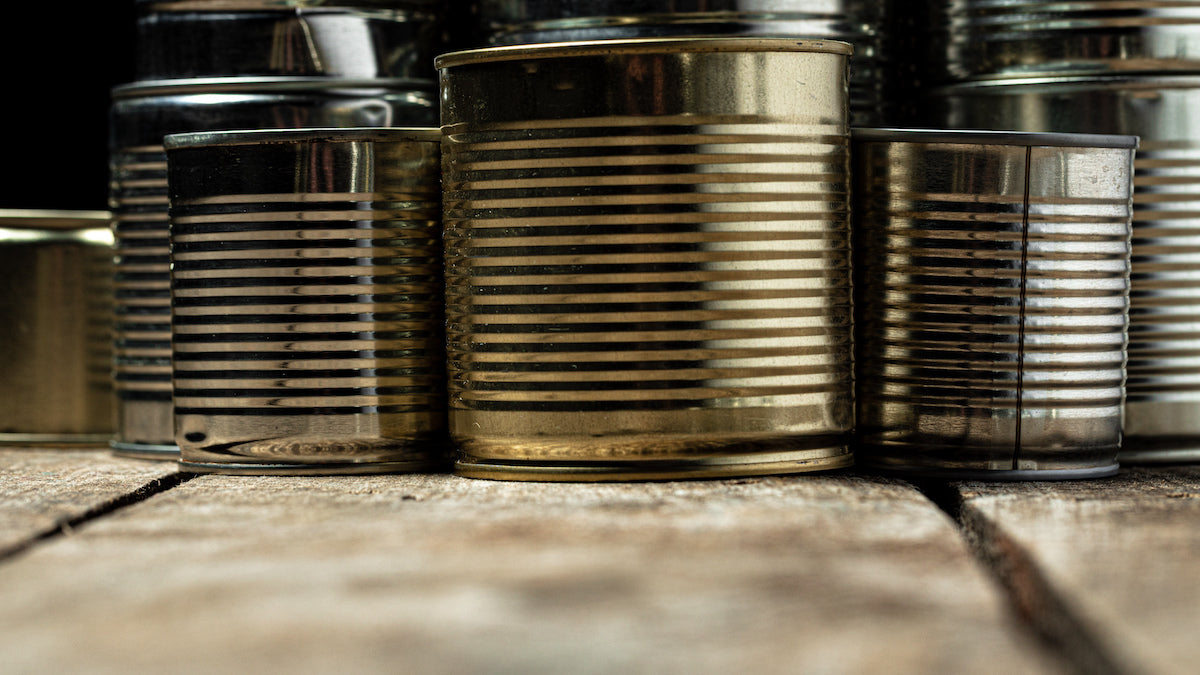
We’ve all been there: You finish up the emergency food in a #10 can, but you can’t bring yourself to throw it away.
Now, you don’t have to!
If you’ve ever thought to yourself, “Surely, there must be something more I can do with this can…”—you’ve been right all along.
From bread pans and makeshift stoves to garden boxes and game traps... there’s no shortage of ways you can repurpose your collection of #10 cans!
1. Storage and Organization
We’ll start with the most obvious of all: You can put stuff in cans.
A basic concept, sure, but one you can take in many directions and use for many purposes. You can use #10 cans to:
STORE FOOD
They are food-safe, after all. Use them to collect food you pick in an emergency from your garden or in the wild, like nuts or berries.
STORE SMALL GEAR ITEMS
#10 cans protect candles, flashlights, and other small, related items. Using one for organization will make your supplies easy to identify when you need them immediately.
KEEP PAPER IN PLACE
Use #10 cans to store important documents, papers, mail, and more. Plus, an empty #10 can makes an excellent storage spot for toilet paper!
ORGANIZE THE GARAGE
Drill an empty #10 can into the garage wall to wrap your garden hose around. Add a few more to store and organize tools, nuts, bolts, and other hardware must-haves.
2. Trash Cans
Leave no trace, both from an environmental standpoint and a safety standpoint. You don’t want threats—whether human or animal—finding you based on what you leave behind.
Repurposed as trash cans, you can reuse empty #10 cans time and time again.
Leave one in each room of the house—or in each corner of your bug-out shelter—to keep things tidy when crisis comes.
3. Provide and Protect Light

Placing candles, fires, and flashlights into a #10 can will help protect and project your light sources.
There may not be a more reliable and portable way to protect small light sources than by placing them into #10 cans. This on its own makes saving your cans worth it.
PROTECT FROM THE ELEMENTS
Place a lit candle into a #10 can to protect it from wind. You also won’t have to worry about melting or dripping wax.
PROTECT FROM FIRE
You can carry your #10 can around or set it on the ground without worrying about what will happen to the flame.
PROTECT SOLAR LIGHTS
Place a solar-powered light inside the can. Once it’s charged, you’ll have a light source that can easily be moved around. To stabilize the light, try pouring sand or cat litter into the can.
MAKE A FLASHLIGHT LANTERN
If you have sand or cat litter, fill up a can with it and stick a flashlight into the center to provide lots of light. For extra light diffusion, puncture holes into the top, near the lip of the can. This is a great option if you don’t have candles or solar-powered lights.
4. Emergency Kits
There’s a reason the #10 can is a tried-and-true emergency preparedness classic: its simple design is INCREDIBLY protective. And just because the food is emptied out doesn’t mean it can’t continue protecting your emergency supply.
PACK A KILLER 72-HOUR CAR KIT
Fill a #10 can (or a few!) with the basics for a 72-hour kit. Whether you’re stuck in bad weather on the highway, your car’s broken down in the middle of nowhere during a road trip, or you’re in an accident that requires emergency items, packing a quick kit for the car is a small step that makes a big difference.
Simply pop the lid on when you're done to prevent spilling and messes.
OVERFLOW STORAGE SPACE
Running out of room in your go-bag? A #10 can makes a great, FREE space for extra storage. Fill #10 cans with:
- Flashlights
- Candles and matches
- Glow sticks or flares
- Emergency blankets
- Hand warmers
- Ponchos
- Non-perishable foods
- Water pouches
- Whatever else you might need in a short-term emergency
To make the can easier to carry, puncture two holes near the top lip and run a small rope through as a handle or strap.
5. Improvised Grain Mill
In a prolonged disaster situation, there may come a time when an improvised grain mill might prove to be useful.
A grain mill can transform wheat, corn, and other grains into ground meal and flour, offering more options for food preparation, cooking, and baking.
This process can be a little complicated, but it is possible with a collection of #10 cans! Click here for detailed instructions.
6. Cooking and Baking
If you’re short on cookware—or simply don’t want to add more weight to your emergency gear—your collection of #10 cans can double as cooking pots and baking pans.
COOKING

Boil water in a #10 can or cook your food directly inside it. Or, cut it into strips and transform it into an ad-hoc grill.
Leave your #10 can the way it is, fill it up with water, and place it on a stove to boil. Then, use this water to mix your dehydrated and freeze-dried emergency meals!
You can also wrap meat, potatoes, or mixed vegetables in aluminum foil, place them in a #10 can, then cook over a fire for a healthy and hearty meal.
Cut a #10 can into strips, widening the can and transforming it into a grill. Cover the open area with aluminum foil, fill the base with fire starter, place a grill over the top, and use to cook meat.
BAKING
Swap bread pans for #10 cans to save money and cupboard space.
If you’re in more of a crisis and short on ingredients, use our Honey Wheat Bread Mix to bake delicious bread without yeast or oil—all you need is water! Or, stock up on our baking essentials that will last for decades.
Plus, this method will surely be a favorite among the kids. Because of the round shape, there won’t be any corners or crusts to complain about!
7. Cutting Cookies
If baking is a beloved pastime for your family, then save the next #10 can and craft a DIY cookie cutter!
Just remove each end of the #10 can, then use it to cut perfect circles from cookie dough, bread dough, pizza dough, and more.
8. Making Tasty Treats
Heard of tin can ice cream? It’s a different take on a classic trick: making ice cream in a bag.
Gather these items and ingredients to make ice cream with empty #10 cans:
- Ice
- Rock salt
- 1 empty soup or coffee can
- 1 empty #10 can
- Aluminum foil, bag, or other lid for both cans
- Mixing bowl
- Spoon
- 2 cups of heavy whipping cream
- 1 teaspoon of vanilla
- 1/2 cup of white sugar
- A pinch of iodized salt
To make this delicious dessert, follow these directions:
- Stir together heavy whipping cream, vanilla, white sugar, and iodized salt in the mixing bowl. This is the ice cream mixture.
- Pour the ice cream mixture into the empty soup or coffee can. Tightly cover with aluminum foil, a bag, or a lid.
- Set the can inside the center of the empty #10 can. Surround the inner can with alternating layers of ice and rock salt until the #10 can is full.
- Tightly cover the #10 can with aluminum foil, a bag, or a lid. Shake the can back and forth for at least 15 minutes.
- Add more ice and rock salt as needed until desired consistency is reached.
See? You can still steal a taste of your family’s favorite summer treat, even in an emergency!
9. DIY Food Dehydrator
Food dehydrators can be costly. But in an emergency, they’ll be invaluable—and likely inaccessible!
Collect the following components:
- #10 cans
- Fan
- Lightbulb
- Wires, switches, and solder
- Rivets and riveter
- Rotary tool
- Can opener
- Sheet metal shears
- Soldering iron
- Drill
- Hot glue gun
The idea is to remove some of these items from existing appliances that have little use or function during a disaster, like vacuums or microwaves.
Though this contraption seems complicated, it’s easier to put together than you might think. For step-by-step instructions and tips, click here!
10. Vertical Gardening
Gardens can be lifesaving emergency resources. If you need to save space, live in an apartment, don’t have the square footage for garden boxes, or simply want to make the most of your wall space, use #10 cans to plant a vertical garden in your home!
Use a drill to mount clean and empty #10 cans to an open wall. Fill them up part-way with soil, then plant herbs and other useful, edible, and medicinal plants you can turn to in an emergency.
If you’d rather preserve your wall space or keep it free of holes, get creative. Use thick rope to connect cans to one another and hang them from the ceiling or on a wall hook. Or, add wreath hangers to the backs of your cans and hang them on the railings of your stairs or porch.
11. Weed Control
Are invasive weeds and plants coming in to attack your growing garden? Use some empty #10 cans to stop them in their tracks!
Dig around your up-and-coming harvest and surround it with empty #10 cans. Placing these durable, steel cans into the ground will protect your plants from being invaded by weeds and other harmful wildlife.
You can cut and unroll a can and put it into the ground, flattened, to prevent weeds from popping up, too.
12. Feeding Scoop
If you’re completely committed to self-reliance, chances are you have a few chickens running around the yard.
You might even have a fully functioning farm, complete with cows, goats, horses, and sheep!
Collect a few #10 cans and use them to feed your farm animals more efficiently. These easy-to-grab cans can be filled with a high volume of animal feed, making the task go by fast.
13. Fire Starter
Fire may be one of the most destructive forces on earth, but there are some materials that can withstand its effects. Aluminum, stainless steel, and similar metals are resistant to fire, even after prolonged exposure at extreme temperatures.
Our #10 cans are made from steel, which cannot catch fire—nor will it aid in spreading flames. They resist oxidation at high temperatures and remain strong in spite of them.
Because of these qualities, you can use our #10 cans to start fires! Add some InstaFire Fire Starter to a can, then use a match or lighter for ignition. The protective barrier of the can will keep your flame lit longer and allow you to move the fire around without extinguishing the flame. Get fire when you need it, wherever you need it, and use it to cook, stay warm, or provide light.
14. Simple Seat
Even in an emergency, you’ve got to make time to kick back and relax. (If you can.) In fact, it might be more important to do so in an emergency than at any other time!
Children, especially, will need time to take a breather. Cover one end of an empty #10 can with foam, batting, and fabric to create a simple seat. Perfect for cooking around the campfire!
To make a larger seat, place one #10 can in the center of your workspace. Arrange additional #10 cans around the center, in the shape of a flower. Connect them together and cover the tops with foam, batting, and fabric to make an adult-sized seat.
15. Trapping Birds

A #10 can placed in a hole with seed surrounding and inside it will trap a small bird.
When you’re struggling to find sustenance, use an empty #10 can to trap fowl you can feed on.
Dig a hole large enough to completely surround the can, open-side facing upwards. The can should be level with the ground (so you're unable to see it at ground level).
Sprinkle wild birdseed onto the ground surrounding the can. Then, sprinkle seed into the can itself—enough to cover half of the metal bottom. This will disguise the trap.
Small birds will peck their way to the can, jump in to eat the seed, then be unable to jump out. You can then kill the bird, cook it, and eat.
16. Target Practice
Need to practice your aim and fire prior to heading out on a hunt?
Line up some empty #10 cans and give ‘em a good shot! Whether your weapon of choice is a rifle or bow and arrow, these cans can take whatever you’ve got.
When hunting, you often have only one chance to catch your prey. Don’t let it go to waste and leave your family feeling hungry!
17. Makeshift Toilet
When you gotta go, you gotta go!
While the outdoors is a pretty forgiving space to answer nature’s call, there may be times that option isn’t the best available. Freezing temperatures, a storm, or trying to stay hidden can make the process a challenge!
Fill a #10 can with cat litter, then use it as a makeshift toilet. It works for cats, it can work for you, too! Cover with a lid if you can’t discard right away.
18. Shelter Shingles
Tree branches and leaves will only take you so far when the weather worsens and you’re stranded without shelter.
Once you’ve built a base for your wilderness survival shelter, you can use #10 cans to cover the top (if they’re available, of course)!
First, clean out and dry the can. Then, cut the ends off of the can with a knife, leaving both ends open. Be careful not to bend or dent the cans in the process.

Cut properly, #10 cans will provide shingles for a wilderness shelter.
Next, cut the can wherever you can find a straight line, then unroll it and flatten it as much as possible. Then, use roofing nails to secure your makeshift shingles to your shelter and protect you from the elements!
Keep a box of roofing nails in your emergency supply for this reason. You never know when you might find yourself in a situation like this.
19. Camp Weights
Don’t you just hate when the wind won’t let you set up camp quickly?
Fill an empty #10 can with rocks and other heavy objects you can find. Then, place the full #10 can on the end of a rope, edge of a tarp, or use it to help hold down other materials that the wind might sweep away.
20. Forge
This project isn’t for the faint of heart, but it’s too cool not to share!
Cut a hole in the bottom of a #10 can, then drill a hole into the side.
Stick an empty can—like Raid or hairspray—into the opening and fill the surrounding space with mixed Plaster of Paris. (Make sure to cover the bottom with the lid to prevent the mixture from spilling out before setting.)
Let it set.
Once set, wipe any mess away, then push the skinny can out of the #10 can. You should be left with a Plaster of Paris mold that has a hole in the middle. It’s ready to use!
15 comments
Howard Warren
Thank you for the great info about using #10 cans.
Beth Catt
The pictue number 2, is that home made or is it for sale? I would like to have one
Pat
As a girl scout when we went camping we used a #10 as a cook top. We cut a arch in the side of the open end big enough to add fuel and we cooked eggs for breakfast
Emma
Do you have instructions for using the honey wheat mix without yeast? Thanks
Betty
I have # 10 cans of dry food that I bought at local store without lids. It would be nice if we could buy extra lids.
Jacquelin Lebeouf
U also can cut the top off and leave part of the bottom. Leave the bottom as a lid. U then can protect a plant if frost ir cold weather cones. It’s a little house for the plant. Open and close it.
Azuredove
Reusable Port.a.potty
Inside a clean dry #10 can place several small trash can liners, one roll of toilet paper, a package of wet wipes and/or hand sanitizer. Replace lid. This can be used many times. To use: Empty can, add plastic liner, do your business. Wipe and Clean your hands placing used wipes inside bag. Remove bag. Tie shut and discard. Can is still clean. Replace new clean items back in can.
Dale
Be careful about using cans to cook. Nowadays most cans are sprayed on the inside with a coating of usually some sort of plastic to protect the steel from corrosion. This will release nasty chemicals at cooking temperatures into the food. I think having a hot fire inside the can and then washing it out should clean it out, but I havent found any source that confirms or denies it. Same issue with heating up foods in the cans they came in.
Don B.
Use then to store empty brass w/lid. Use them to scoop animal feed. Use them as picking buckets for berries & other small fruits (wire handle). Use them as nail buckets for working the fence line repair. Store baked items like dog biscuits. Have seen old cabins where they were used as stove pipe repair. Used them to collect cooking stove grease for disposal. Have used them as temporary drip catches under the sink when the hardware store was closed.
Beth
Next time, show a picture of what you’ve done with the can. It is hard to imagine some of these ideas without a picture. Abstract images won’t cut it during an emergency.
Nikki L Mann
My son just waits for me to empty one!! He builds and sells amazing Tin Men and your empty cans are the best!!
Todd
Not sure of this… would it be an effective Faraday container, using a clean-cut can opener for the metal (not pull-top foil) lid, and metallic tape to seal in the contents?
Ruby
In my ward we have a canning machine to reuse our #10 cans, we wash them and refill then use a new lid, and reseal,
Susan Christensen
Keep a firearm and extra ammo in a can with the label still on it to conceal its contents and keep it handy in your food storage location. Only you know it’s not corn.