When we compare our lives to those of our parents and grandparents, it’s astounding to see how much has changed. From modes of travel to the advancement of computers and phones, modern comforts and conveniences are in ample supply.
Taking our ancestors into consideration, the differences between our lives are nearly night and day! For our ancestors, tasks such as cooking and washing clothes required a great deal of effort.
Today, baking bread outdoors might seem like an impossible task. But remember, baking bread outdoors was once the only option!
In this article, we’ll discover how to bake bread outdoors when resources are scarce. With the right set of supplies, baking bread outdoors is not only possible—it can be simple, too!

Using an Outdoor Oven
An outdoor oven makes it easier than ever to bring fresh-baked bread to the backwoods.
The Ember Oven is the one we’d recommend above all others!
This unique outdoor cooking solution combines the convenience and functionality you find in your oven from home. The first self-powered oven that’s safe to use indoors and outdoors, it’s the ideal choice for your emergency preparedness supply, basement bunker, camping trips, and even backyard barbeques!
How is the Ember Oven different from the other options out there?
- No electricity needed! Completely self-powered, all it requires is biomass like leaves, pinecones, or sticks. It can run on charcoal, canned heat, and other fire starters, too!
- Cooks every meal evenly, every time. No need to worry about burned crusts and ooey, gooey middles.
- Quickly reaches temperatures as high as 550°F!
- Features easy-to-use controls that increase oxygen flow, adjust temperatures with precision, and instantly clear coal and ash.
- Lightweight and conveniently compact. No clunk, here!

The Ember Oven can be used to bake just about anything. From dinner dishes like lasagna or casserole to dessert plates like pastries and cookies, this outdoor oven infuses the familiar flavors of home into meals made anywhere else.
Speaking of the familiar flavors of home, what about that fresh-baked bread? It can be concocted in a snap thanks to our mouthwatering Honey Wheat Bread mix.
Here’s how to bake bread outdoors with our Honey Wheat Bread mix and the Ember Oven:
- Use the knobs to preheat the Ember Oven to 375°F and allow it to heat to the appropriate temperature. It won’t take long, so be sure to keep watch!
- Combine the Honey Wheat Bread mix with water. Refer to the packaging on the #10 can for the desired mix-to-water ratio.
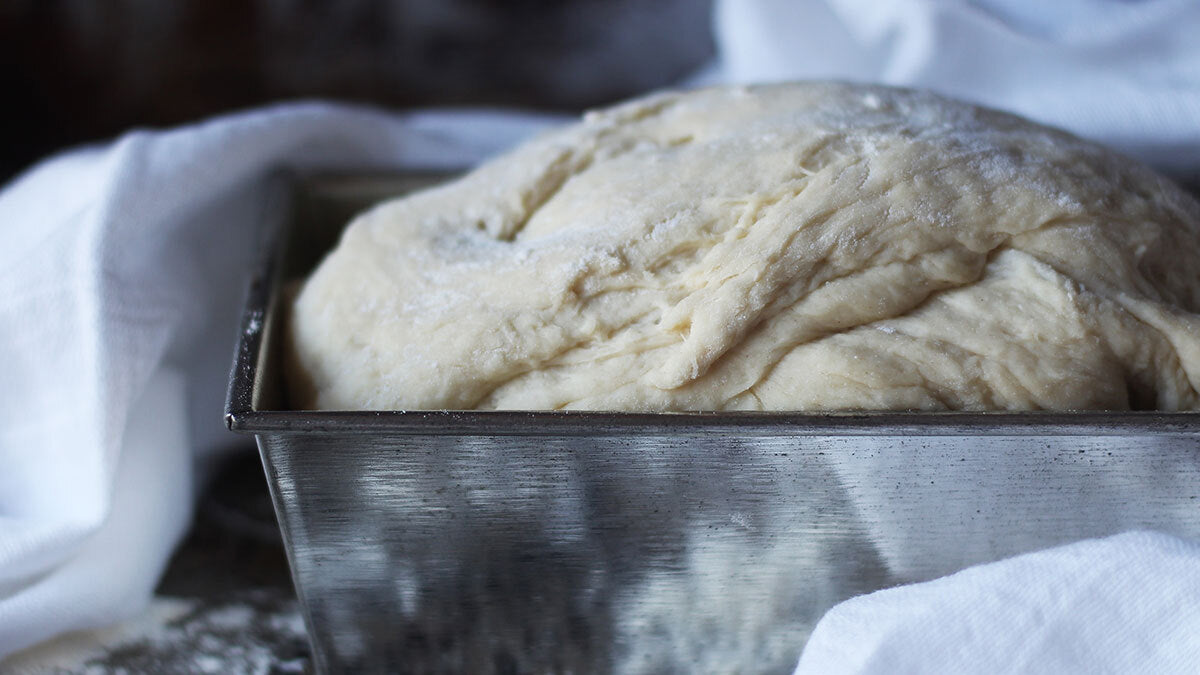
- On top of a flat and dry surface, sprinkle some flour and start kneading the bread dough.
- Continue to knead the dough for 10 minutes, or until elastic and smooth.
- Place into a bread pan, bake for 25-35 minutes, then let cool.

Baking Bread the Old-Fashioned Way
You might be asking, “why bread?” What led our ancestors to make bread such an important part of their diet?
In addition to being a filling food that pairs well with a variety of meals, it can be made simply with few ingredients. However, for the more advanced bakers, bread could also be made with more complex ingredients. Cheese breads, fruit breads, spiced breads, and more offered ambitious bakers a delicious challenge.
Plus, bread could be eaten without keeping it cool or heating it up. And when kept in the right conditions, it could last a long while.
Common bread ingredients included (and still include):
- Flour
- Oats
- Oil
- Salt
- Shortening
- Sugar
- Water
- Yeast

After mixing the ingredients together, forming the dough, and kneading the dough, our ancestors might have baked their breads in cast-iron pots or pans over a fire, depending on their access to certain cooking tools.
If you are without an outdoor oven, here’s how to bake bread outdoors:
- A Dutch oven or cast-iron pot can be used to bake bread outdoors. Simply form your bread dough into round loaves, then set them into the Dutch oven or cast-iron pot. For best results, place the cookware onto coals. Add even more coals to the lid, then wait. Check on the appearance every few minutes. Patience is important for this method of baking!
- Pots made from aluminum, clay, or stainless steel can also be used to bake bread outdoors. In fact, these items can often be found sitting around in your camping gear! Just set your dough into the pot, improvise a lid (if a lid is not included), and the pot becomes an outdoor oven of its own.
- If you don’t have pots or lids, never fear. You can use a cast-iron skillet! This method is intended for making flatbreads, so the finished product may have a different look, taste, and texture than what you’re used to. But this bread is still bread, nonetheless!

Enrich Your Outdoor-Baked Bread
Bread—especially our very own Honey Wheat Bread—is a warm, soft, and delicious treat all on its own. But in an emergency, having a handful of options for snacking on a slice can help keep spirits high.
Try out these tasty ways to add even more flavor to your fresh-baked bread:
Banana Slices
Top a slice with even more slices! Our Banana Slices are a sweet treat for sprinkling onto bread. Add a crunchy contrast to your soft slice!
Pair with our Peanut Butter Powder for even more flavor. Bananas, peanut butter, and bread? A fun and filling snack!
Blueberries, Raspberries & Strawberries
Fruit is an excellent addition to a soft slice of bread. Like our Banana Slices, our bountiful selection of berries can also be added atop a piece of bread. For breakfast or a quick snack, berries and bread are a must-add to your emergency supply!
You can also use our Blueberries, Raspberries, and Strawberries to make your own jam. Because they’re freeze-dried, their freshness and flavor are locked in. Simply add water to plump them up, then mix with some sugar, salt, and lemon juice over heat.
Click here for tips on making a basic fruit jam!
Butter Powder
Our Honey Wheat Bread and Butter Powder are the bread and butter of survival!
Bread and butter make a delicious duo as a breakfast favorite, snack, or dinner side. Simply combine our Butter Powder with water and you’ll be able to slather it on a slice in seconds!
Honey Crystals
Sweeten the toughness of survival with our Honey Crystals! No snack melts in your mouth quite like a slice of bread with a smooth honey spread.
Whisk these crystals with cold water, bring to a boil, cook, then let cool. It won’t be long before you can complete your Honey Wheat Bread with our honey spread!
Peanut Butter Powder
Spread a little protein onto a piece of bread with our Peanut Butter Powder. Whether you choose peanut butter toast or a classic peanut butter sandwich, this is just the combination you need for an extra boost of energy!
This Peanut Butter Powder lasts so much longer than peanut butter from the store. No oil, no oxygen—just peanuts plus a little sugar and salt. Just add a little water for creamy peanut butter anytime, anywhere!

Baking Bread Outdoors: Making the Impossible, Possible
Baking bread outdoors may not be ideal, but it couldn’t be further from impossible.
With a little help from the easy-to-use Ember Oven, our long-lasting bread-making ingredients, and knowledge of the more primitive methods of baking bread outdoors, you can take the comfort of fresh-baked bread with you wherever you go!