30 days is an important benchmark for most disasters. The winds, floods, and shaking of the first few hours and days have long passed. Water is back, and power’s online. For many, life goes back to normal.
There are those, however, for whom 30 days is just the beginning. The people who have lost homes, jobs, or even loved ones, have a long road ahead.
And beyond that, there are disasters that can stretch well past the 30-day mark. Imagine a COVID-like outbreak with an even higher fatality rate. Or perhaps a solar flare or EMP that takes out massive portions of the US power grid, leaving millions in a months-long blackout.
If the last year has taught us anything, it’s that the unimaginable is possible.
For these types of emergencies and many more, it’s critical to be prepared for a month of disaster and beyond. In this post, we’ll show you exactly how to do that.
Water: 30 Days and Beyond

Some disasters will outlast your portable filters and barreled water. For those, you’re going to need to find your own water source—something that won’t run out.

Before we get into the best permanent water sources, there are two important things to know.
Have a plan.
Water is the most valuable resource in an emergency, meaning it will always be in high demand. And as we’ve learned recently, high-demand items can disappear quickly.
In the case of water, sources can deplete, become contaminated, or in extreme cases become dangerous to even approach.
That’s why it’s important to have multiple water sources available. We suggest creating a plan that accounts for three separate sources you can rely on—some public, others private and protected.
Long-term filtration options.
In a long-term emergency, most water sources are going to require a filter. For example, if you plan on using city water (where it’s available), you’ll want a whole-home or under-sink filter.
For offsite sources, where you’ll be transferring large amounts of water from a river, lake, or canal, a barrel pump or on-counter filter is best.
The good news is you can stock up on filters to your heart’s content. Dry filters are basically plastic cartridges filled with activated carbon and no other chemicals. Unopened, they’ll last indefinitely.
Buy a dozen. Buy more! Water’s so important, it’s almost impossible to have too many filters. Just store them in a dry, protected environment.

Make your own water filter.
If worse comes to worse and you’re out of options, you can get by with a temporary homemade filter until you find something better. All you need are a few supplies:
- Hammer and nail
- Activated charcoal
- Gravel
- Large cup or Mason jar
- Plastic bottle with a cap
- Box cutter
- Coffee filter
- Sand
- Vessel for water collection
If you can’t find activated charcoal, you can make it at home with calcium chloride (which you can substitute with bleach or lemon juice) and homemade charcoal (burnt wood). Take our advice and make it in large batches. Like filters, it lasts indefinitely on the shelf.
Instructions
Cut off the bottom inch of your plastic bottle with the box cutter. With a hammer and nail, make a hole right in the center of the bottle lid. Cover the mouth of the open bottle with a coffee filter and then screw the cap (with hole) on. This will be your bottle filter.
Place the bottle filter upside down into the mouth of a large cup or jar. Fill the bottom third of the bottle with activated charcoal. Fill the middle of the bottle with sand. Fill the remaining empty space with gravel.
Once you’ve got your filter, there are few important things to remember.
First, trust your eyes. If the water still looks murky after just one filter, you may have to run it through the filter one or two more times to get it clear.
Second, this filter will not kill organisms. Boil your water for one to three minutes after you’ve filtered it.
Third, the coffee filter might soak up contaminants, so change it out after every use.

Water source: City water
It’s hard to find a more convenient and abundant option than the water coming right out of your tap—just don’t rely on it alone. If you’re lucky enough to have access to city water in a long-term emergency, make sure you take the following steps to protect yourself.
First, don’t assume in an emergency that because water is coming out of the tap, it’s OK to drink. Just to be safe, we recommend picking up a water testing kit that that will ping for the presence of lead, pesticides, iron, copper, unsafe pH levels, chlorine, nitrates/nitrites, and bacteria.
Along with testing, keep an ear out for official statements on water quality. Authorities should post information on local contamination events.
Water Sources: Rainwater

Rainwater can be a good way to supplement your water supply. It’s clean (in most regions), private, and totally free. It’s great for drinking as long as you keep your collection vessels spotless, and harvesting it can be as easy as setting a bucket out under a downspout.
There are more elaborate and expensive methods than a bucket, too. You can install 50 to 100-gallon downspout water collection barrels or even a sophisticated “wet” and “dry” system that holds enough water to last months.
Of course, your mileage will vary based on where you live and how many collection vessels you have on hand.
For perspective, a rainfall of one inch over one acre of ground would render 27,143 gallons of water. If you could collect just a fraction of that, you’d be in pretty good shape. And if you’re in a wet, cloudy area like Seattle that averages 38 inches of rainfall per year, that could add up quickly.
Natural ground sources

If there’s a river, stream, or lake near your home, it can also make a good water source—but be careful! Lots of impurities can be filtered, but if a source is contaminated directly by industrial or commercial waste, you’ll want to stay away.
Barring this, even clear-looking, running water can contain bacteria, viruses, and parasites like cryptosporidiosis or giardiasis. Do everything you can to gather information on the source of the water and test it regularly and at multiple locations.
If you find a suitable source, clean it with the best filter you can get your hands on, then store it in barrels and buckets or on-counter filters.
Check legal rights
Keep in mind, it may be illegal to draw or pump water from many of the sources near your home. If they’re on private land, you must contact the owner first and receive explicit permission. You may even want to write it out and get a signature.
If you find sources on public lands, check for legal rights with the US Fish & Game Department and/or the Environmental Protection Agency (EPA).
Re-use
There’s lots of water that goes to waste in our homes and capturing it can add tons of volume to your supply. Some simple ways to do that include:
- Watering plants with used cooking water (from boiling pasta, beans, etc.)
- Re-using the water you wash fruits and veggies with
- Re-using bath and shower water (for gardening)
- Melting and re-using unwanted or extra ice
- Collecting overflow from watering plants
- Building a rain garden
And the list could go on. Don’t be afraid to get creative!
Greywater system

Image Source: https://www.landscaping-capetown.co.za/
If you’re really serious about building up your water supply, you might consider installing a greywater system that filters waste for second use from places like washing machines and baths. By some estimates, greywater systems can save you up to 40,000 gallons of water per year.
With a little know-how, you can install simple greywater units yourself, like laundry drums or laundry to landscape systems. Or, if you’ve got the budget, home installations can last a very long time.
Food: 30 Days and Beyond

Just like with water, you need to put together at least a month of food storage (and six months to a year if you can). You also need to find renewable sources of food so you won’t have to fight crowds and empty shelves at the store.
Here are some tips to help you get there.
Cover the basics
We’ve already recommended focusing on calories (2,000 per day) and building your supply around macro and micronutrients. That doesn’t change as the disaster drags on. In fact, it becomes even more important.Food fatigue is real! Variety is the answer
What you do need to start thinking about, though, beyond just nutrition, is variety.
Imagine what it would feel like to eat the same food every day for a month. You’d be dragging your feet by the end of the first week! You need to mix it up with meals you eat to help keep your spirits up. That means a distinct breakfast, lunch, and dinner, with traditional foods for each of those meals. It also means different types of foods: American, Italian, Mexican, etc.
Local, seasonal eating
In a long-term disaster that disrupted the food chain, one of the first things you’d notice is that produce actually goes out of season. It’s true! Heck, some of it could disappear altogether from your area. That’s why it’s important, whether you’re shopping for produce or cultivating your own, that you understand which foods grow best, and when.
Seasonalfoodguide.org is a great place to start. It lets you filter by state, month, and produce type to find reliable crops in your area by season. Beyond that, there are plenty of books written on the subject. Here’s a well-rated seasonal food guide for super cheap (one cent at the time of this writing) on Amazon.
Gardening.
If you’ve got space available, there’s no better way to become food independent than by starting a garden. You don’t need acres of land to produce a healthy amount of food, either—just a 10x10-foot plot will do.
Common Sense Home recommends these 10 steps to get started with your first garden:
- Decide what you’d like to grow (the guides above should help).
- Choose a location. Again, 10x10 feet is a great start.
- Plan your garden bed carefully. Make sure there aren’t gas lines running under it; figure out where the sun hits at 10 am, noon, 2 pm, and 4 pm seasonally (this will help planning crops); find a way to protect it from animals—the list goes on.
- Invest in basic garden tools. A hand trowel, pruning shears, hose and/or a watering can, garden rake, and angled shovel are a good start. Beyond that, gather the basic building blocks for the garden itself: 2x4 lumber, deck screws, wide-mesh hardware cloth, heavy-duty plastic sheeting, and raised bed soil should get you off and running.
- Test your soil. You can pick up soil test kits at most hardware stores or do your own DIY soil test.
- Prepare the soil with compost and/or manure.
- Choose the right seeds for your tastes, region, and season.
- Plant. Most seed packets describe planting depth, though the rule of thumb is to plant at a depth equal to three times the seed’s diameter.
- Nurture. Books have been written on this step, and your tactics will differ by region and crop.
- Enjoy!
Canning
Since you won’t eat everything in your garden right away, canning is an essential skill for long-term food preparation. And since there’s more than one way to can, the first rule of thumb is knowing the right methods for the right foods:

Pressure canning: Vegetables, poultry, meats, fish, or seafood must be canned in a pressure canner. Regular pressure cookers are not recommended for canning because their thinner walls and smaller size do not allow for proper build-up or pressure reducing time, thus failing to destroy all harmful organisms.
Boiling water bath or steam method: Fruit, jams, jellies, pickles, sauerkraut, marmalades, and fruit butters can safely be canned by boiling water or steaming methods. If you’re a novice, be careful of steam canning—you need to get the heat just right.
Oven and microwave canning are never recommended.
Other crucial canning tips
- If you live at or over 1,000 feet above sea level, read your canner’s instructions on increasing time or pressure levels.
- Use quart or pint-sized Mason jars, not old mayonnaise or pickle jars for processing. Half-gallon jars are not recommended for home canning.
- Use new lids and clean rings that are round, not warped or rusted.
- Be as clean and careful as possible in preparing your jars and your food. Wipe the jar rims with a clean cloth or paper towel before putting lids on.
Hunting and fishing
While we don’t recommend that every human with a pulse pick up a Winchester and head for the hills, experienced hunters and fishers have the ultimate renewable resource at their fingertips: nature itself. They are set up to thrive in an emergency.
It takes a lot of work to get that point, though. The first step is to get certified. For hunting, there are safety certification courses that teach about the basic skills and equipment you’ll need as well as the environments and animals you’ll encounter. It will also teach you the ethics of bringing down game—a must for any serious student of hunting.
There’s a licensing process for fishing as well, but it’s usually less involved. Some states don’t require one at all.
Next, you’ll need the right equipment (which will depend on the game you’re after). As a general tip, American firearms.org recommends the Winchester 70 featherweight, the Remington 700 ADL 6.5 Creedmoore, and the Ruger American 6.5 Creedmore Rifle w. Vortex for the novice hunter.
For fishing, spinning rods are popular for beginners. They let you make long casts with light lures and have easy-to-operate, open-faced reels.
Maybe the most important advice for both hunting and fishing is to find more experienced friends in the hobbies and to practice, practice, practice. A disaster is no time to get started in either of these pursuits. By then, it may be too late.
And remember, you can’t hunt just anywhere. Private land is off limits without explicit permission (don’t poach!) as are many public lands. Check with the National Park Service, the U.S. Fish and Wildlife Service, or the Bureau of Land Management to find areas for hunting near you.
Supplement your food storage
In a survey conducted by Emergency Essentials to over 100,000 customers, 82% reported having the goal to collect up to a year or more of food and water—a worthy objective!
But there’s an easy way to extend the life of those supplies far beyond a year—especially if they have long shelf lives. The trick is to strategically supplement your emergency food supplies with canned, hunted, foraged, and store-bought goods.
Some of the survivors we talk to have even charted out the best combinations of emergency and store-bought foods for multiplying meals and maximizing nutrition. It might be a good idea to take a look at your supplies and chart out your own plan.
Temporary Power: 30 Days and Beyond
Power outages are like a set of dominoes. When one piece falls, it starts a chain reaction that brings others toppling down. It’s not alarmist to say that a massive, extended grid failure would be more than an inconvenience—it could become life threatening in a matter of days.
Or, as Ted Koppel put it in his book “Lights Out: A Cyberattack, A Nation Unprepared, Surviving the Aftermath, “Without ready access to electricity, we are thrust back into another age—an age in which many of us would lack both the experience and the resources to survive.”
The truth is, unless you live off the grid entirely—and perhaps outside the city—it would be tough to escape all the repercussions of a massive power outage.
The best you can do (without totally upending your lifestyle) is to invest in back-up power for your home.
Luckily, there are lots of options for this. Here are some of the best available to everyday people.
Portable generators
The most popular for emergency use, portable generators are relatively small and often come on wheels so you can haul them around. They don’t require installation and are inexpensive compared to other options. These machines are great for running a small handful of appliances for short periods of time.
What they don’t do well is power your entire home, which means you’ll have to be selective in how you use them. They also require a fair bit of work to keep running. Most of them are hand-start only and need frequent top offs. If you do decide to go portable, remember to keep the unit 10 feet away from the house to avoid carbon monoxide poisoning.
Gasoline generators
You see these lining the aisles of your local hardware store—they’re by far the most popular make. They’re easy to use, relatively affordable, and pretty darned sturdy.
The big downside of gas generators is that they require fuel, which can be hard or even impossible to come by in an emergency. And once your supply is gone, you may be out of luck for a while. If you’re not careful, many models can freeze in the winter. And of course, gas generators are famously noisy. This might annoy your neighbors—unless they’re borrowing power, in which case they’re bound to be a little more forgiving.

Diesel generators
These are similar to standard gasoline models, except they run on diesel. Diesel generators are more fuel efficient, meaning they’ll run longer on the same amount of fuel. Diesel burns cooler too, reducing the levels of heat in your engine and extending the life of the unit; these can last a lifetime.
Like gasoline generators, of course, diesel generators run off fuel which can be problematic during a disaster where supplies are scarce. They can also malfunction in wet environments.
Dual-fuel generators
If you want the best of both worlds, you can’t go wrong with a dual-fuel generator. They run on two types of fuel (typically diesel and natural) and can even switch between the two depending on which is more available and more efficient. Most importantly for emergencies, dual generators give you twice as many options when fuel supplies get scarce.
The biggest drawback of dual fuel generators is that they can be pretty bulky, making them less portable. But, for long-term sheltering where you mostly stay put, this won’t hurt you too much.
Solar Generators
Solar generators switch out fuel injection for solar panels and batteries that capture sunlight and convert it to power. That means no storing, treating, or rotating fuel. And even more importantly, in emergencies it means no running out of fuel, either. It’s a huge upside, and the reason we recommend solar generators as a great option for backup power.
But they’re not without their flaws. Solar generators tend to be more expensive than gas generators and are a bit more fragile. They also take a while to charge, meaning you need to plan your usage more carefully.
Perpetual Power: 30 Days and Beyond
Portable generators—gas, diesel, or otherwise—are the quintessential backup appliance. They’re built as a stop gap while you search for a more permanent solution. It’s not a great idea to run them continuously over the course of weeks, and certainly not months.
Alternatives to standard portable: the standby generator.
“Standby” generators, on the other hand, can run much longer if they’re properly maintained with oil and fuel. These are a much better power solution for households off the grid for 30 days and beyond. These amazing machines will get your average home up and running like nothing ever happened. They’re quieter and safer than their portable counterparts and operate automatically.They are, however, very expensive. Between hardware and installation, a standard model will cost you north of $10,000, and that’s not including the expense of regular professional maintenance. You get what you pay for, though. Standby generators are reliable and last around 15 years.
Off-the-grid electrical system options.
There are plenty of options for off-the-grid living, but like standby generators, they’re going to cost you. However, because lots of these options are sustainable, they should theoretically pay you back over time.
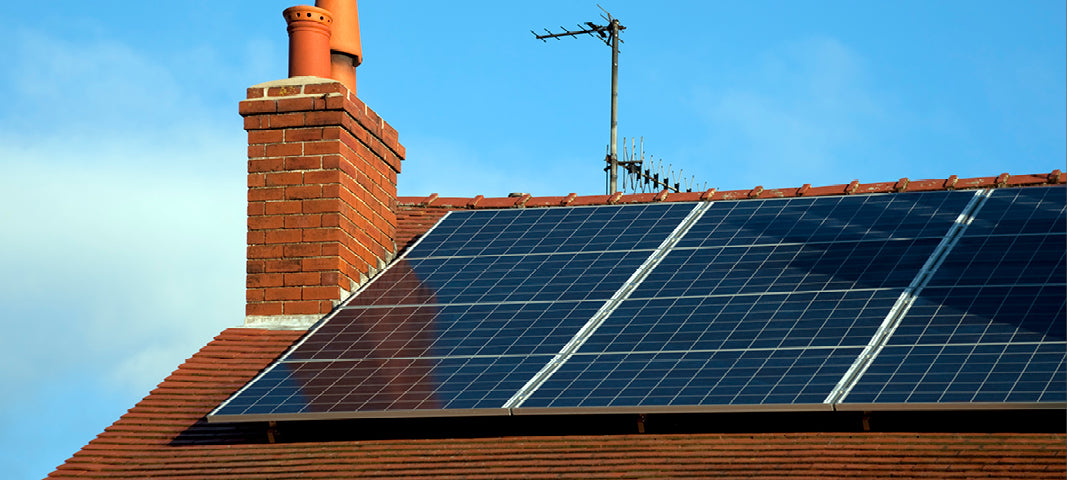
The best option out there might well be going solar. The rooftop panels we’re seeing more and more of these days are designed to last 20 years and can be pretty darned reliable during that time span. They do require some upkeep as well as a considerable initial investment.
By the way, solar power systems don’t take you “off the grid,” technically. Most of them are actually connected to the grid with utility power acting as an “unlimited” backup source for your home.
Emotional States
Sometimes, the most enduring damage that disasters leave behind isn’t to your property—it’s to your mental health. The best way to prepare yourself is to understand the signs and know where to get help.
Disillusionment.

After the early “honeymoon phase” of disaster (where survivors start to believe that things will get to back to normal quickly) comes the inevitable crash down to reality. This is the beginning of the disillusionment phase, where people realize the limits of disaster assistance. They start feeling abandoned by the groups that once gave them hope.
During the disillusionment phase, optimism becomes discouragement, stress continues to take a toll, and destructive behaviors like substance abuse may begin to surface.
Post-Traumatic Stress Syndrome (PTSD)
After a major disaster, some survivors are haunted by distressing thoughts and feelings. Many earthquake survivors report waking up in a sweat when the bed shakes or a large truck drives by their home. Hurricane survivors might live with the anxiety that the next catastrophic storm is just around the corner.Getting Help
It’s not going to resolve all of your stress, but getting prepared can help allay the fears that come along with disasters.
There are worse coping mechanisms.
And when getting prepared isn’t enough, you may need help. The US Department of Health & Human Services has a number of resources available including the National Disaster Distress Helpline at 1-800-985-5990. They’re also reachable by texting “TalkWithUs” to 66746. The hotline is tollfree and available 24/7.
For more sustained help, we recommend seeing a mental health professional on a regular basis. Thankfully, the stigma around therapy has lifted in recent decades. Many insurance plans will cover a portion of therapy visits. If that’s outside your budget, there are some free therapy options available, too.
If you’re desperately in need of immediate help, visit a community mental health clinic. Some of these groups receive supplemental funding from places like the United Way and are able to offer treatment at a very low cost.
If none of these options work for you, try talking to a family member, friend, priest, or pastor. A supportive ear can go a long way in helping you heal.
If you feel that you’re in danger of self-harm, contact the National Suicide Prevention Lifeline at 1-800-273-TALK immediately for help.
1 Month & Beyond Checklist
For now, get our complete 1-Month Kit Checklist. It will list out the food and gear we covered in this article PLUS some indispensable supplies we didn’t have time to get to.
Click here to download our 1-Month & Beyond Emergency Checklist.
And in case you missed them:
Click here to download our 72-hour (Days 1-3) Kit Checklist
Click here to download our 2-Week (Days 4-14) Kit Checklist.
2 comments
Mark
6.5 Creedmoor is great for hunting elk from across the valley. A better hunting weapon (IMHO) is a 12 gauge shotgun. Good for smaller game with birdshot, up to deer with slugs, and good for all kinds of predators.
Dual Fuel Generators run off of gasoline or propane (LP). Diesel engines and gasoline engines are too mechanically different to flip a switch to change fuel.
Standby generators for most houses up to 20KW are closer to $5000 before installation and run on natural gas or LP. They can be switched off for half of everyday to save fuel and wear and tear.
Solar systems can take you off the grid if batteries, inverters, and chargers are purchased. Most people just install the grid tie type of system to lower their electric bill but it does nothing for disaster preparedness.
Greg Hall
If you don’t have battery backed Solar, then when the grid goes down so does your power on many Solar systems. Because many systems are only designed to backfeed to the Grid and not the home.