Welcome to the second entry in our National Preparedness Month A to Z Series. If you missed it, make sure to read last week’s article where we laid out a detailed road map to help you build an incredible three-day supply.
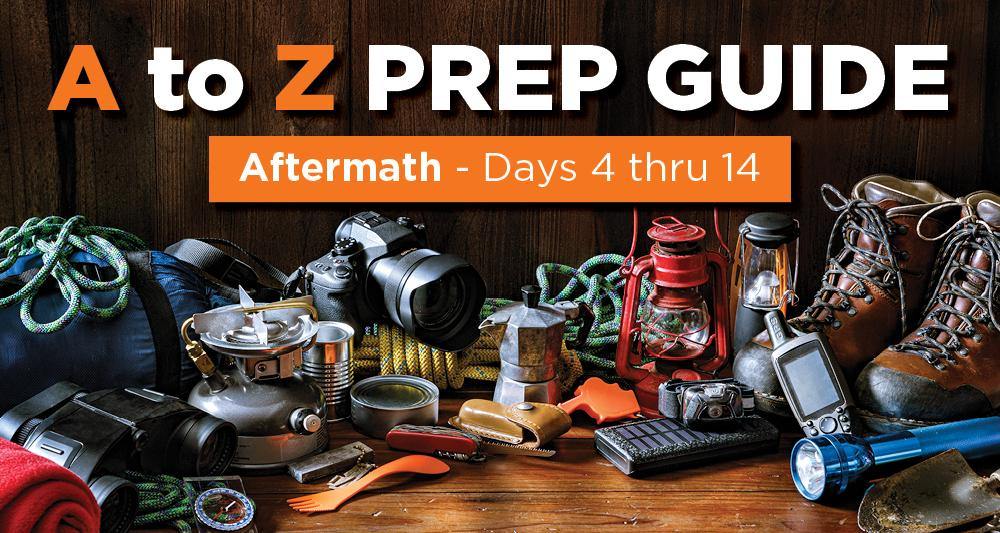
This week we’re going in-depth on how to prepare for the next phase of an emergency: days 4 through 14.
In the last decade or so, the two-week supply has become the recommended minimum in emergency preparedness by organizations like FEMA and the Red Cross. However, most experts (including the ones at FEMA) are quick to point out that these agencies aren’t truly equipped to deal with every wide-spread emergency, and help may take even longer to arrive.
If you follow our advice below, you’ll never have to wait on a FEMA or anyone else for help. You can be fully independent for two weeks and beyond!
Disaster Timeline: New Challenges
Like before, instead of just giving you a checklist (see our printable 2-week kit checklist at the bottom of the post), we’re going to look at the specific challenges you’ll face during a major emergency and talk about the supplies and skills you need to be ready for them.
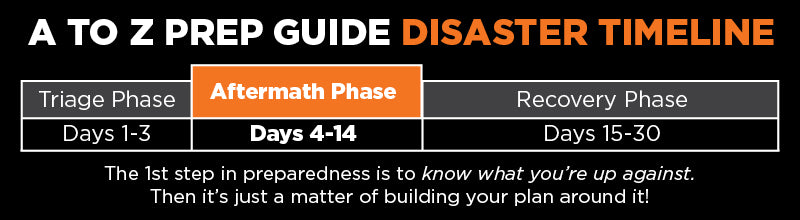
We’ve pulled these from professional emergency managers and our own interviews with disaster survivors to create a “disaster timeline” for days 4 to 14. We call it the “Aftermath Phase.”
Preparing for the First 14 Days: Aftermath Phase
This period of disaster is its own beast—different in lots of ways from what we talked about last week. As things calm down and the emergency stretches on, you’re going to be thinking more about the future, dealing with new hazards, and hopefully finding new ways to stay nourished and healthy.

The opening hours and days of a disaster are all about your personal survival. But if there’s one thing that’s been consistent in our interviews with survivors, it’s this: once the dust settles, people start helping their neighbors, too.
It’s a beautiful, inspiring thing.
Giving of Your Resources
So far we’ve talked exclusively about how to help yourself and your family in an emergency. But as you prepare, keep in mind that lots of people around you will need help too.

When Tanis walked out of her house for the first time after an F3 tornado touched down, she could hardly believe what she was seeing.
“Our shop was in the front yard and just a wad of metal. It [was] dark and raining and [there was] twisted metal everywhere…There was just nothing left. You just can’t comprehend it."
Her first thought was to her neighbors.
"I stayed with the baby and my husband and son ran to check on neighbors. [They’d] had trees fall into their houses [and] water pouring in. [The] ceilings [were] falling in…The two immediate neighbors ended up coming over. They slept in our granddaughters’ room."
How to Prepare
Preparing to help your neighbors can be as simple as just storing up a little extra—and anything helps. Many of the survivors we’ve talked to were able to share life-saving supplies like water and complete meals. Others handed out coffee, diapers, and garden vegetables.
Having said that, it would be better if your family and neighbors were already prepared and didn't need your assistance. To help make this happen (or get as close as possible), we will dedicate an entire blog post this month to community preparedness. Stay tuned!
Giving of Your Time
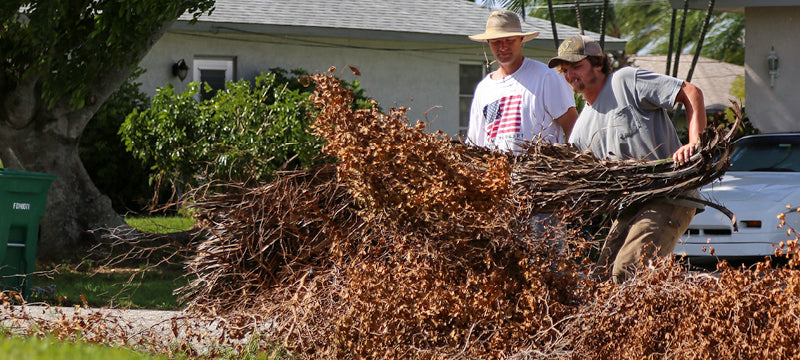
After a disaster, we see pictures in the news of debris fields and collapsed buildings and we talk about the devastation. What we don’t talk about—probably because it doesn’t sell as well in the media—is the mess. Someone has to clean that up!
And more often than not, the first people on the scene are the residents. Many of the survivors we’ve talked to reported that they spent the first week or two after the disaster just clearing out their properties and neighborhoods.
“You couldn’t get out of our neighborhood because of the trees crossing the roads,” one survivor said. “People immediately started getting their chainsaws and we started to do what we could.”
How to Prepare

Part of being prepared for the first couple weeks after a major disaster is having the equipment, clothing, and food to begin the work of recovery. This includes boots, gloves, shears, a chainsaw, fuel, and more. (See our checklist at the bottom of this post for a complete list).
Tension Between Personal Security and Serving
Even though helping your neighbors remain secure is a once-in-a-lifetime opportunity to serve, your own security is important too.
And to be honest, if you’re prepared with food and supplies, there’s a good chance people around you will notice and ask for help.
Weighing your own needs against the needs of your community is very personal. It’s a topic that folks in the preparedness community discuss a lot, and for good reason: looting during disasters can be a real problem.
Hurricane Katrina is a prime example. Theft was famously widespread in the aftermath, sometimes in full view of authorities. Hurricane Michael also saw its fair share of looting. For the first week, 10 suspected looters were arrested every night in Florida, some attempting to break into “blacked-out” residences.
How to Prepare
Know the risks – While looting in disasters isn’t unheard of, it’s rarer than the media sometimes makes it out to be. It certainly doesn’t happen in every disaster, and even when it does, it’s much more common in commercial areas.
Discuss and decide beforehand – One of the survivors we interviewed wisely recommended a “balanced” approach to sharing your supply. Put some thought into this while you’re preparing. Discuss with your household what your boundaries ought to be and write them down in your emergency plan.
If you decide sharing your supply is safe and appropriate, you might even put aside a specific portion to give out and keep the rest separated in a secure area.

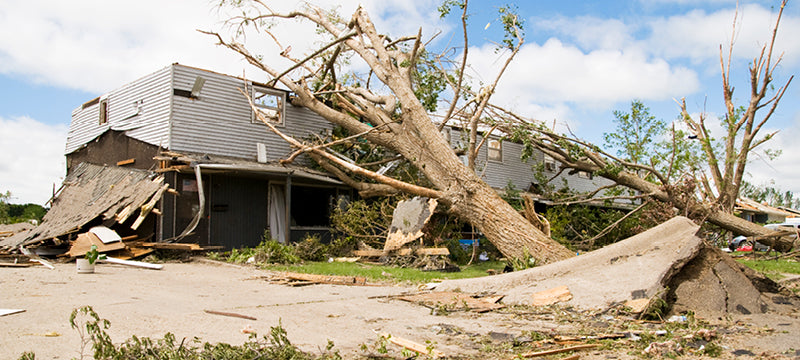
After many disasters, one of the big features of everyday life is the damage left behind. Depending on how badly your area is hit, you might spend a big chunk of your time assessing, clearing, and repairing some of these hazards.
For people in disaster areas, the grind of cleanup becomes the “new normal” (as one survivor put it) and can last for weeks. As such, it’s important to understand the most common hazards and how to get ready for them.
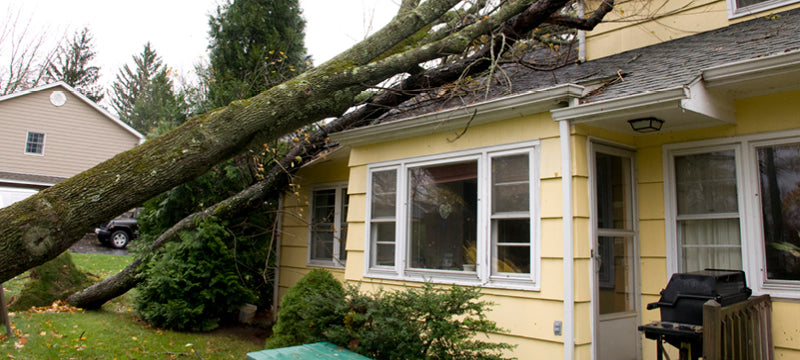
Downed/Sagging Power Lines.
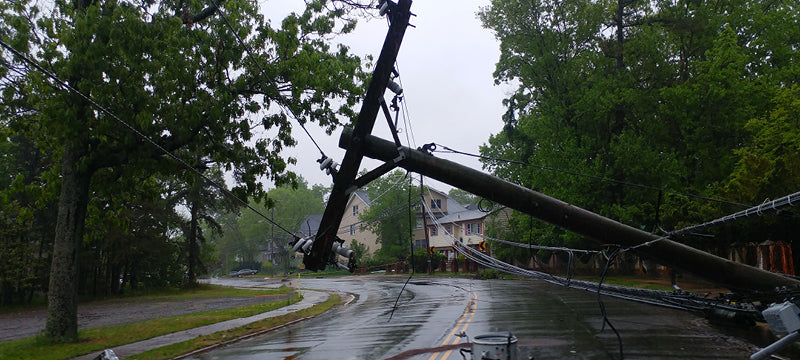
Most major disasters topple power lines by the thousands. And even though the power’s out, lines can still hold a significant charge. Don’t assume you’re safe because the power grid is down and nearby lines aren’t sparking.
In and around water – Don’t get anywhere near standing waters that are close to sagging or fallen power lines.
Driving through downed lines – If lines fall across your car, keep driving. If the car stalls, do not turn off the ignition. Stay in the car. Do not let anyone approach your vehicle. If you have to exit, try to jump completely clear, making sure not to touch the ground and car at the same time. Land with both feet together, then shuffle away.
Metal objects—fences, pipes, etc. – Generally, after a major disaster, avoid touching metal objects like fences that could be electrified from contact with power lines you can’t see.
More than metal – While you want to keep an eye out for metal objects, know that lines can energize other objects nearby like bushes, trees, and telephone wires.
Touching or near fallen trees. Broken lines can get tangled in fallen trees and bushes. Before you start clearing out roughage, stand 10 feet away and take a very close, long look at the area from every possible angle. If you can get a second pair of eyes on the area as well, all the better.
How to Prepare
Avoid, avoid, avoid – We can’t say this enough. Don’t attempt to move, contain, or repair a downed line in any way.
Know how to avoid—practice your shuffle step – The proper minimum distance from a downed line or anything touching it is a minimum of 10 feet. The proper method to move away from the line is to shuffle with small steps, keeping your feet together and on the ground at all times. This decreases the chance of a strong shock (but won’t fully protect you).
Let others know – Tell your neighbors about the location of a downed line in your neighborhood. Once you’re able to contact them, let emergency workers know, too. You may even want mark the area off with police tape or chalk (again, at a distance of at least 10 feet).
Utility emergency contact – Include your utility company in your list of emergency contacts. Once you’re able, get ahold of them with the specific locations of downed lines. Companies will come out as soon as possible for repairs, and your help can speed up that process.
Wear protective gear – Make sure you have rubber-soled shoes (boots if you can) and non-conductive gloves while you’re working to clear any area. Rubber—while it won’t make you invulnerable to deadly shock—does not conduct electricity and is safer than the alternatives.
Debris
Large-scale disasters can produce more waste in the form of debris than many communities handle in a year. This debris comes from buildings, trees, bushes, cars, agricultural by-product, and more. Debris fields are dangerous and should be avoided. They can:
- Become energized by live wires
- Contain hazardous chemicals like asbestos
- Conceal everything from gas leaks to fires
- Be full of exposed, jagged edges
- Shift and collapse from foot fall, aftershocks, strong winds, and more
Preparing to deal with debris will require many of the same steps as dealing with live wires.
How to Prepare
Avoid, avoid, avoid – Trees and branches are one thing, but do not attempt to clear out major debris fields around buildings unless you're cleared by authorities or in a life or death situation. Know that if you do attempt to save another person in a debris field, you put your own life at risk and hazard forcing rescue workers to pull two people out rather than one.
Contact debris management – There are federal, state, and local personnel specially equipped and trained to remove debris after disasters. Include these contacts in your emergency plan (see our printable 2-week kit checklist at the bottom of this article):
- The National Response Center at 800-424-8802 for emergencies and other sudden threats to public health.
- Poison Control at 800-222-1222 for suspected chemical or pesticide poisoning.

Entering Buildings and Assessing Damage
Major disasters put the structures we create to the ultimate test. If you can tell that a building is damaged, the general rule of thumb is NOT to enter.
But what if the home is yours? What if it’s holding something precious, like your emergency supplies or, heaven forbid, a loved one?
Before you go rushing into a home that may put you at risk, know the signs of danger:
Still burning, flooded, or moving – These are no-brainers. Entering a building under any of these conditions means risking your life.
Clearly shifted off its foundation – Buildings that have separated from their foundation can collapse and contain severed electric and gas lines. Stay away.
Visible electrocution signs – If you can see exposed electrical wiring in any environment at all—but especially a wet one—do not enter.
Visible explosion or poison signs – If you can see broken or loose gas pipes or fuel spills, then the building is at risk of explosion or gas poisoning.
Clear collapse warning signs – Bowing foundations, horizontal dislocation, and major cracks in the foundation can all mean a building is collapsing. Stay clear.
How to enter a compromised building – If, against all advice to the contrary, you still insist on entering a compromised building, know what you’re getting into as much as possible.
First, check the building for any of the conditions above. Then do everything you can to safely shut off the building’s gas, electric, and water before you enter.
If you have a gas or N95 mask, bring it along. Wear rubber soled shoes that can help protect against shock (though not in open water). Take some non-conducive gloves as well.
Stay out of crawl spaces, where you’re more likely to be trapped. And finally, make sure others know that you’re entering the building. Bring a radio (or cell if there’s service) and call for help immediately if you’re injured.

Grinding out two weeks without enough water and food is about the hardest thing ever. Here’s how to make sure it doesn’t happen to you.
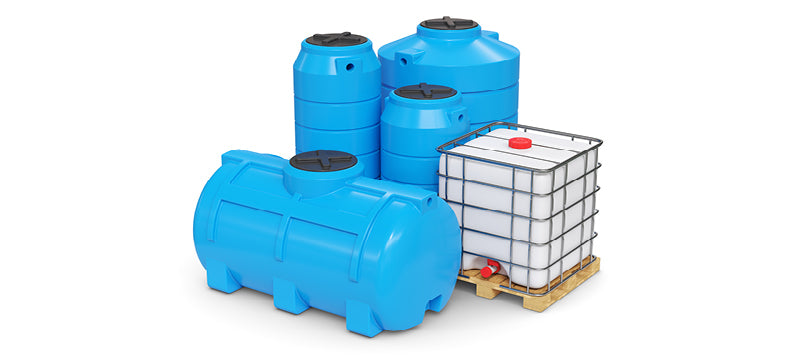
Water
Be prepared to live without a public water supply for at least a few days, if not longer. The chain of infrastructure required to pump water into your homes is immense, and there are many points of vulnerability.
One survivor reported that after the disaster cleared, “the county water district [was] out because of some [downed] pumping stations. There were people without water for a week to ten days.”
How to Prepare
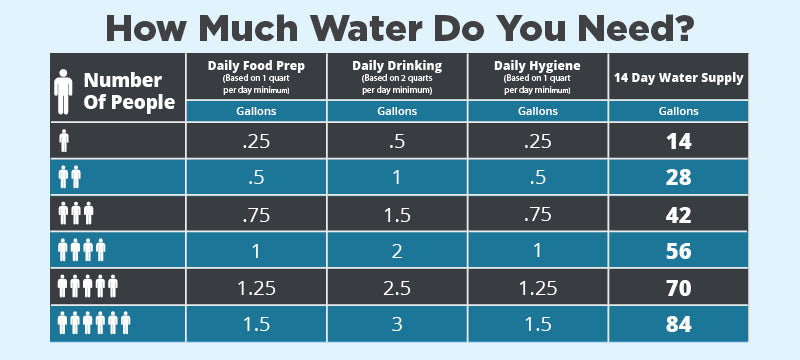
Store More Water Than You “Technically” Needed – When it comes to water, it’s much better to be over-prepared. The chart above gives you a baseline for water storage, but we recommend putting away even more than you need.
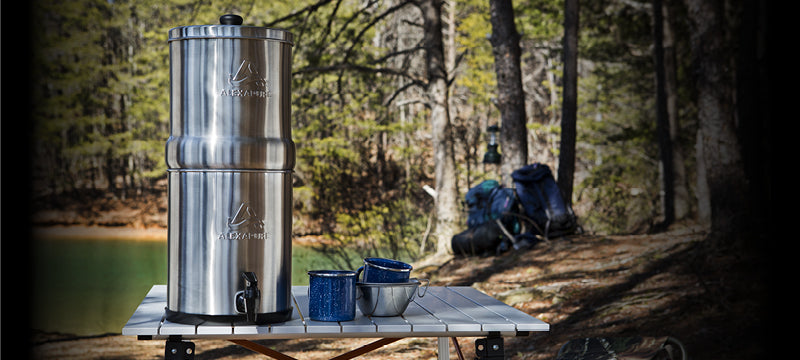
Get a Bigger Filter – Now that you don’t have to worry about fitting everything into a bug-out bag, trade in your little portable filter for a larger counter top model. We recommend the Alexapure Pro. It holds over two gallons of water at a time and clears out 99 percent of contaminants with a power-free, gravity-fed filter.
Roll out the Water Barrels – Unless you have a well, the centerpiece of your two-week water supply should be large-capacity storage barrels. The best containers are polyethylene drums with a capacity of 15 gallons or more.
Make sure to pick up a drum cap and bung wrench for sealing and unsealing the barrel. You also need a water pump, siphon hose, or spigot to remove water.
Store barrels in a cool, dark area—indoors is best for protection against deterioration, microbe formation, and freezing temperatures. It’s also a good idea to have a solid insulation barrier (like wood) between the bottom of the barrel and the ground. Rotate it once a year for freshness.
Just to be safe, we recommend either filtering the water, you can even purchase a pump with a built-in filter, or treating the water with bleach before you use it in an emergency (at a ratio of four drops of bleach per quart of water).
Harvest Rainwater – Put a bucket under the drop spouts on your home, and you can collect rainwater by the gallons. It’s great for jobs like flushing toilets, bathing, watering plants, and more.
Check out our post on preparing for 30 days and beyond for more tips on rainwater harvesting and other water recycling strategies.
Mix It Up – Drink mixes might not be at the top of your survival list, but it’s one of the “foods” that survivors say they miss most.
One family talked about how important Gatorade was to their mental sanity after weeks of emergency water. “That’s one thing I’d store more of if I could go back and do it again,” the mother explained.
Drink mixes can also contain valuable electrolytes like sodium, calcium, and potassium. These balance the amount of water in your body; help maintain pH, nutrient, and waste levels; and ensure your muscles, heart, and brain function properly.
Food
Like water, food might be hard to come by for the first week or two. To play it safe, plan to live on your emergency supply exclusively for the first two weeks—whether you end up needing to or not.
How to Prepare

Know how much food you need for two weeks – Keep focused on calories. 2,000 a day should do the job for most adults in the first two weeks (for 28,000 total calories).
Broaden your nutrition profile – Macro nutrients are still key in the first two weeks—no diet eating in disaster! Fill your supply with foods high in fat, carbs, and protein.
At 4 to 14 days, you’ll want to start integrating micronutrients as well. These are the roughly 30 vitamins and minerals that your body can’t produce enough of to fill its needs. They may not impact your well-being immediately, but they make a huge difference over time.
If your emergency supply is well-stocked with fruits, vegetables, eggs, meats, and entrees, you’ll get many of those vitamins through your meals. To supplement the rest, we recommend you also stock a great multivitamin. Make sure it comes with:
- Iron: Important for healthy blood, oxygen levels, and energy.
- Vitamin A: Helps keep your organs functioning properly—heart, lungs, kidneys, and others.
- Vitamin D: Keeps bones, teeth, and muscles healthy.
- Iodine: The body needs iodine to make thyroid hormones. These hormones control the body's metabolism and many other important functions.
- Folic Acid: Needed for cell growth and function.
- Zinc: Improves your immune system and metabolism. It’s also important in healing wounds.
Taste is important – As much as we love them, after three days of Datrex bars and MREs, “regular food” is going to sound like a dream come true. Give into your cravings and treat yourself to a great meal! Research shows that “consuming foods associated with good thoughts and warm feelings not only improves a sense of well-being, they also decrease loneliness.” Looking forward to a good meal might be the only thing that keeps you going when the days get long and tough.
Stretch your food – Even if you’ve got lots of food stored away, it doesn’t mean you’ll get to eat it all. Unexpected visitors, mold, and even a tree through your garage could ruin parts of your supply.

You’ll be safer if you learn how to stretch out what you’ve got. One great tip from a family that lived on their food supply for weeks is to stock up on extra sauces, rice, and pastas. “[We liked] the marinara sauce. That gave a different flavor. We made some noodles and put that over it. We put the sauce over rice. That made it easier.”
Learn the foraging basics – If all else fails, there are some great sources of calories and protein in your yard.
Protein
- Nettles – These are only two amino acids short of a complete protein.
- Hazelnuts – These can be eaten raw or cooked. Like nettles, they’re just brimming with protein.
- Acorns - 50 species of acorns grow in the US. They require some prep to leach them of their bitter tannic acids.
- Walnuts - Walnut trees are a fixture in many a backyard, farm, and horse property. They grow in regions all over the country but thrive particularly well in parts of the central and eastern US.
- Maple seeds - You’ve seen those flying little winged pods that fall from maple trees, but did you know they’re edible, tasty, and rich in nutrients? Just pick them up off the ground—the seeds can be eaten raw.
Calories

- Cattail roots. Cattails may not look very appetizing, but they’re quite edible and rich in calories. The tips of cattails can be eaten, as can the bottoms of the stalks and the roots.
- Walnuts and Blueberries. Not a complete meal, but darned close.
- Wild Rice. Used the world over to add calories and heft to meals. A cup serves up a generous 120 grams of carbs, 10 grams of fiber, and 24 grams of protein. Difficult to harvest but worth it.
Learn more about these easy forgeables here.
If you’re looking for even more help, there are some great foraging apps out there. For our money, the best is the “Edible Plant Guide” with information on over 950 plants and 2,500-plus helpful images. You can get it for just $2.99 in the Apple and Google Play stores.
Also, check out these Edible Wild Foods Playing Cards with tons of information to help make foraging easier and fun.

The first two weeks after a disaster are going to bring their share of fear and struggle, just like the first three days did.
But it’s not all doom and gloom.
Many survivors actually report feeling strong pangs of optimism during this period—especially the folks getting their hands dirty in recovery efforts. It's been described as the post-disaster "honeymoon phase."
By the end of the first week, good news begins rolling in. The cavalry arrives (FEMA, the Red Cross, and others) with supplies aplenty. Community bonding occurs. People start getting the sense that things will return to normal, quickly.
A dose of optimism is a good thing! It’s good for heart health, blood pressure, and more. During disasters, it’s also been found to have a positive effect on personal recovery and mental health. It makes it easier to cope with home damage and post-traumatic stress syndrome.
But too much optimism can also hurt you. As the weeks and months drag on, this honeymoon period actually turns to disillusionment for many people as they realize the true limits of disaster assistance (more on that in next week’s article).
Aftermath Phase (Days 4-14) Checklist
For now, get our complete 2-Week Kit Checklist. It will list out the food and gear we covered in this article PLUS some indispensable supplies we didn’t have time to get to.
Click here to download our 2-Week (Days 4-14) Kit Checklist.
And in case you missed it last week:
Click here to download our 72-hour (Days 1-3) Kit Checklist
1 comment
Rosalind Smith
I’ve been working on Emergency Prep for many years, including CERT training and think your information is excellent—-very helpful.