

Once a weapon of myths and legends, the bow and arrow can now be found in any sporting goods or outdoors store for bow hunting enthusiasts . . . And while there is a large selection of bows and arrows to choose from, have you ever wondered what it’d be like to make your own handcrafted bow?
In a survival situation, knowing how to make your own bow and arrow could help you get food to feed yourself and your family—if you run out of MREs and Mountain House pouches and have to hunt. Also, if you know how to make a bow and arrow, you’ll have a back-up if yours breaks or you can’t take it with you when you evacuate. Knowing how to make a bow and arrow will make you more self-sufficient.
So let’s put another notch in your survival tool belt. Here’s a basic how-to that will help you make a hunt-worthy bow and arrow set.
Survival Bow Instructions
The folks at Wildernesscollege.com came up with, what they call a “quickie” bow tutorial for beginning bow crafters. The reason why it’s called a “quickie” is because it is “made at the time the wood is harvested instead of waiting a year plus for the wood to cure (as is typical for regular bow construction.)” The advantage is that this is ready to use right away (for survival situations); the down side is that it may crack or break as it dries out.
1. Choosing Wood
Some of the best woods for making bows include osage orange, yew, ash, black locust, and hickory, though most hardwoods can work (oak, maple, beech). Replace a relatively straight 5 foot long (1.5-2 inches in diameter) section of sapling or branch that is free of knots, side branches, and twists. Cut this carefully so not to crack or split the wood.
2. Replaceing the Belly, Back, Handhold, and Limbs
Stand the stave (the limb you just cut) on the ground and hold loosely with one hand, then push outward lightly on the middle of the bow. The stave will swivel to show you which way it is slightly curved. The outside is the “back” and the inside is the “belly.” Do not touch the back, as it receives most of the tension and damage can cause the bow to break.
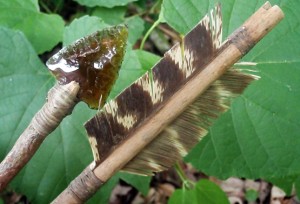

Photo Courtesy of Wildernesscollege.com
Replace the middle and mark out your handhold area (3 inches from the center in both directions). The area above the handhold is the upper limb; the area below is the lower limb. 3. Shaping Put the bottom tip on your foot and hold the top tip while pushing outward from the belly (only push a few inches). Look at how the limbs bend and observe the areas that do not. Remove wood from the belly of the limbs where they do not bend and leave material where the limb bends a lot (DO NOT REMOVE WOOD FROM THE BACK!). The goal is to get the limbs to bend evenly. Remove material slowly and recheck frequently. The handhold and tips should remain straight or have very little bend. 4. Notches for the Bow String Once you have achieved even flex throughout the length of the limbs, you can carve small notches on both sides of each tip, being careful not to carve into the back of the bow. They don’t need to be very deep, only enough to keep a string in place. Tie the bow string on (nylon, sinew, or plant fiber) so there is about 5 to 6 inches between the string and the handhold when the bow is strung. Do not pull back on the string yet.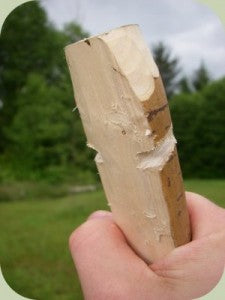 Photo Courtesy of Wildernesscollege.com
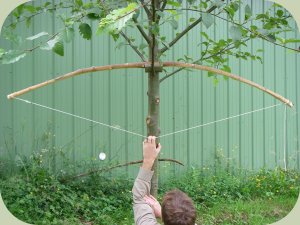 Photo Courtesy of Wildernesscollege.com
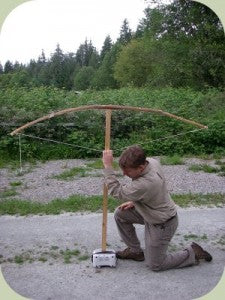 Photo Courtesy of Wildernesscollege.com
photo courtesy of Survival.Outdoorlife.com
Collect branches and straight saplings that are at least 30 inches long and have a diameter between 3/8 and ½ inch. Trim off side branches (or Replace some without side branches). Remember that the extra water of green wood will make the shaft heavier (unless you dry the wood for a couple months). Peel off the bark carefully and carve off any knots or branches. Straighten crooked spots by heating them for 30 seconds over an open flame, bend it a little beyond straight and hold until it cools. Cut a notch about ¼ inch deep into the end of the shaft (to attach to the bowstring while shooting). Be careful not to split the arrow. Cut a similar one in the head to receive a stone or metal arrowhead. Make a metal head by grinding and filing thin, flat steel pieces. Stone or glass can be chipped into an arrowhead. Add glue to the notch, insert the arrowhead, and wrap with twine or other fibers. Seal with more glue.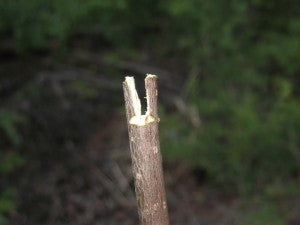
Photo courtesy of Sensible Survival Blog
Fletch the arrow by gathering and splitting bird wing or tail feathers in half (they need to all be from the same side of the bird). Shorten to 4-5 inches and 1/2 inch wide. Space equally around the arrow and glue. Secure with the same cord used on the arrowhead (you can substitute duct tape for feathers in a bind).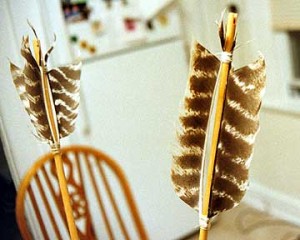
Photo Courtesy of Primitiveways.com
There you have it! Bow and arrows. Have you made some before? What are your tips for making or shooting? Additional Tips and Sources Survival Mastery: Bow and Arrow Field and Stream: Bow and Arrow