From the Pros Who Do It All Day, Every Day
Sometimes touted as the silver bullet of emergency food preparedness, freeze-drying is a lot trickier and more expensive than the Internet makes it look.
Check out our quick master tips on freeze-drying foods at home (straight from our in-house pros who do it all day, every day) including pitfalls you need to know and the best foods to start with.
What is Freeze Drying?
Put very simply, freeze-drying is the process of removing water from food.
Why would you want to remove water from food, you may ask?
For starters, it extends the shelf life. It also preserves the nutrients while retaining structure, color, and taste.
How Does Freeze Drying Work?

To explain freeze drying in simple terms, all you need to know are these three steps.
Step 1: Flash-Freeze the Food. To begin the freeze-drying process, food must be completely frozen, all the way through.
The best method of freezing—and the one you ought to use at home—is called “flash freeze drying.” This is an industrial technique where we drop the temperature of foods very, very quickly to prevent water molecules from aggregating and ruining texture on a cellular level.
Without advanced equipment it’s tough to truly flash freeze dry at home, but you can ballpark it by washing your foods, separating them onto a flat pan (so they aren’t touching one another), and freezing them at as low a temperature as possible.
Step 2: Place the Frozen Food in a Vacuum. Once in the vacuum, pressure changes so when heat is applied, the ice molecules in the food turn immediately into a gas, skipping the liquid phase. The only way to reliably do this at home is with a quality freeze drying machine (more on this below).
Step 3: Keep Water out of the Food. Inside the vacuum the gas water vapor is captured so it does not return to the food. This leaves only nutrient, caloric, and protein-rich food behind.
Don't Get Caught in These Pitfalls!

If you want to give freeze-drying a shot at home, there are a few things to keep in mind.
Home Freeze-Dyer Basics. An at-home freeze-dryer can set you back anywhere from 1,000 dollars to over 5,000 dollars. Most weigh about 150 to 250 pounds, are roughly the size of a mini refrigerator, and are about as loud as a washing machine.
Get the Right Freeze Dryer—Don’t Skimp! One of the most commonly Googled “freeze-drying” -related phrases is “are freeze-dryers worth it?”
The question is related to the super-high price of a unit, and the answer is complicated.
However, what we can say is this: with an at-home freeze dryer, go with a top-of-the-line unit.
Here’s why.
The key to freeze drying is removing water, and we’ve found that more powerful units are just plain better at it. The higher cost also gets you a larger size, and the bigger the freeze-dryer, the more efficient your prep will be. That’s because a larger unit saves you time over the long run by allowing you to up-size your batches.
So as much as we hate to say it, to make at-home freeze-drying even remotely worth it, our experts advise starting with a 2,500 dollars unit as a minimum and to seriously consider forking out for the more expensive 5,000 dollar units.
Times and temps are hard—get them right through experimentation. One of the trickiest parts of professional and at-home freeze-drying is finding the right times and temperatures for every food you make—these will differ from food to food! It’s hard to count how many batches of fruits, veggies, and meats we’ve had to go through to get just the right combination for our freeze-dried foods. We’ve invested thousands of hours and millions of dollars of trial-and-error research into it.
If you decide to get started with your own freeze drying, the key to getting temperature and “cooking” durations right is knowing the water content of your foods.
To help with that, here’s a list (from the National Center for Biotechnology) of some popular foods and their water content:
The Water Content Range for Selected Foods
| 100% | Water |
| 90-99% | Fat-free milk, cantaloupe, strawberries, watermelon, lettuce, cabbage, celery, spinach, pickles, squash (cooked) |
| 80-89% | Fruit juice, yogurt, apples, grapes, oranges, carrots, broccoli (cooked), pears, pineapple |
| 70-79% | Bananas, avocados, cottage cheese, ricotta cheese, potato (baked), corn (cooked), shrimp |
| 60-69% | Pasta, legumes, salmon, ice cream, chicken breast |
| 50-59% | Ground beef, hot dogs, feta cheese, tenderloin steak (cooked) |
| 40-49% | Pizza |
| 30-39% | Cheddar cheese, bagels, bread |
| 20-29% | Pepperoni, sausage, cake, biscuits |
| 10-19% | Butter, margarine, raisins |
| 1-9% | Walnuts, peanuts (dry roasted), chocolate chip cookies, crackers, cereals, pretzels, taco shells, peanut butter |
| 0% | Oils, sugars |
Oils, fats, and sugars are the enemy! As you get started on your freeze-drying journey, we recommend staying away from foods that are high in oils, fats, and sugars. That means butters, mayonnaise, syrups, and peanut butter are better left off your list.

Think of it this way: if a food is hard to freeze, it will be very hard to freeze-dry. However, if you do need long-shelf-life butter, honey, and peanut butter, we’ve got you covered! Check out our options here, at beprepared.com.
Freeze-drying does not cook your food—beware of bacteria. As you work on your freeze-drying, be aware that all foods must be in an edible state before they go into the prep chamber.
That means if you are preparing meats or foods that may carry bacteria they MUST be fully cooked before you freeze them. If not, the bacteria will remain in the food and may get you sick. The freeze-drying process does not clean or kill germs at any point. What you put in is what you get out.
The Best Foods to Start Your Freeze-Drying Journey With
If you are looking to start freeze-drying at home, try out one of these three foods first:

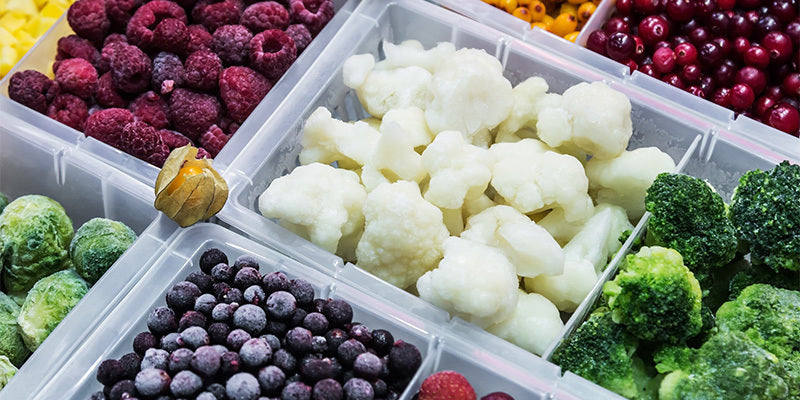
Pineapple. This one has a high-water content but is easy to freeze and leaves behind most nutrients and an extra sweet flavor. Pineapple also has minimal health risks if the process doesn’t work out quite right. Just toss it out and try again.

Mozzarella Cheese. As cheese goes, mozzarella is fairly dry—that’s helpful and makes it a great starter food. The less water you begin with, the less you have to remove during the freeze-drying process. One warning: with less moisture, mozzarella is a little harder to chill. However, once it’s iced all the way through, the freeze-drying process is pretty quick

Asparagus. This last at-home trial should test the skills you’ve learned from the pineapple and mozzarella cheese. Asparagus has more water than mozzarella but less than pineapple. It’s stalkier and denser, and therefore extracting the water from ice to gas will be the most challenging of the three.
8 comments
Don
I been using my food saver vac machine for packaging after freez drying. Any thoughts???
Bonnie
Do you guys offer a reasonably priced free dryer that is not too heavy? If so at what price?
Hyeryun Chung
Is it easy to cleans?
How much and size?
John Dach
I forgot to say that FDed food retains about 95-98% of the nutritional value of the food verses dehydration looses about 50% of the nutrient value AND FDed foods if properly contained and held can last for 30 to 25 years,,,,,, dehydrated foods do not have this long storage capability as they have too much water in them.
John D.
I first was purchasing food from EE but then decided to invest in a freeze dryer (Freeze Right) and have been FDing for about 5 years. It is really good to be able to perpare food the way YOU like it and FD it. I was doing some raw meats but have pretty much changed to doing all meats cooked before FDing. If it is ever needed in a REAL emergency, if necessary you can eat any FDed food right out of the bag and drink plenty of water (the FDed food is totally dry and you HAVE TO BE SURE to drink enough to rehydrate it in you tummy!!!!). Also make pet treats. Treats for grand kids (sweet corn makes for a super great treat and healthy!!!!). It does take time to prep and load and package the food, deal with the oil in the FDer, cleaning it, andy other maint. as needed. Cost here in WA to run a batch (4 self unit) is under $2.00 but we have pretty low rates so other areas will be higher. If you don’t "have the time or energy or $$ " o do your own FDing, Emergency Essentials is definitely the way to go. Be sure, no matter what you choose to do, to “practice” using the FDed foods so in an emergence you will already know what to do to feed those you are trying to feed without looking for directions on how to do it..
Henry M Niedzwiecki
Now I remember why I didn’t get into Freeze Drying….the PRICE!
Pat
Great article! But I think I’ll just purchase freeze-dried instead of trying it at home.
Albert Lee
Didn’t see any info on freeze dryers. Have you evaluated different freeze dryers?