Why is it that with more air-conditioned homes than ever, heat-related illness and deaths are exploding—especially among older adults?
It may be connected to a growing number of power outages; the US has more than any other developed nation.
Those of us in hot areas know how to get cool. We drink extra water. We wear thin cotton. We run for shade. And that all works fine—under normal circumstances.
The problem is, when it comes to heat, more people are finding themselves under extreme and unusual circumstances they never planned for.
Get Ready for More “Texas-Style” Power Outages

If you need proof, just look at what’s been going on in Texas.
After historic winter outages left over 150 people dead this year, the Electric Reliability Council of Texas (ERCOT) is warning the entire state to conserve energy or face summer blackouts. As NBCs Deon Hampton puts it, “No matter the season, customers of the Electric Reliability Council of Texas are learning that they may be better off relying on themselves.”
That’s a lesson we should all take to heart. The US power grid is run down and outdated. Just this year, the American Society of Civil Engineers gave the entire US energy industry a “C-“ for poor reliability.
The time to prepare is now. As temperatures rise and power grids max out, learning to control the temperature in your home without electricity is a fundamental emergency preparedness skill. It’s right up there with storing food and water.
To help hone your skills, we’ve put together a list of little-known, incredibly effective emergency hacks to cool your house—no power needed—plus a super simple tutorial for an off-grid swamp cooler.
Put Storm Windows & Doors in Before the Heat Hits
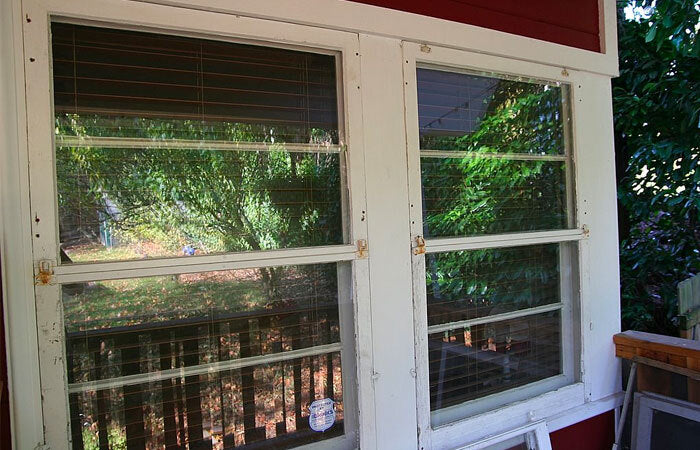
One of the biggest sources of heat transference in any home are your windows and doors, and you can all but eliminate that heat with a few simple steps.
The first step is a trick that folks in stormy regions of the country know well, but that might be new to some of us out West.
It’s simple: install storm windows and doors.
That’s right! Storm windows and doors don’t just protect your home, they’re also great for insulation. Combine them with the additional steps below, and they’ll become the foundation for cooling your home during blackouts.
Tape Foil over Windows

Now that you’re locking in cool air with your storm windows, it’s time to repel the sunlight. It may look a little weird, but foil-taped windows stop heat and reflect it outward better than just about anything.
To apply the foil, measure the area of your windows and add three inches. Use masking tape (not duct or Scotch tape—they damage paint) to affix it. For even more effective insulation, lay down a layer of bubble wrap between the foil and window.
Use Blackout Curtains to Block the Sun
Here’s the final step in insulating your windows. Black-out curtains can be incredibly effective at cooling a room. On their own, they can cut down outside heat by 24%.
A Triple Threat to Beat the Heat
Between the aluminum/bubble wrap, storm windows, and black-out curtains, you can get the temperature way down, even when it’s blazing hot outside.
DIY Evaporation Cooler/Swamp Cooler

Now that you’ve taken steps to keep heat out, here’s a crafty little device anyone can build to create your own cold air, completely off grid.
Items Needed
- Plastic five-gallon bucket
- A small table fan
- A power drill
- A 1.5-inch hole saw bit and a two-inch hole saw bit
- 1 evaporative cooling pad
- Roll of window screen mesh
- Mini submersible water pump with 4.5 feet of tubing
- Spring clamp
- A pushpin
Instructions
1. Pour two gallons of water in the bucket. With the power drill and the 1.5-inch hole saw bit, cut a set of two holes in the side of the bucket, one on top of the other, separated by about an inch of space, like so:

2. Cut another set of holes about six to eight inches away from the first, like so:

3. Now cut the same sets of holes, with the same measurements, all the way around the bucket.
4. Between each set of holes, drill a larger hole with the 2-inch bit, like so:

5. Cut a piece from the evaporative pad about 13 to 14 inches high and 30 to 31 inches long. Roll it into a tube shape and insert into your bucket, like so:
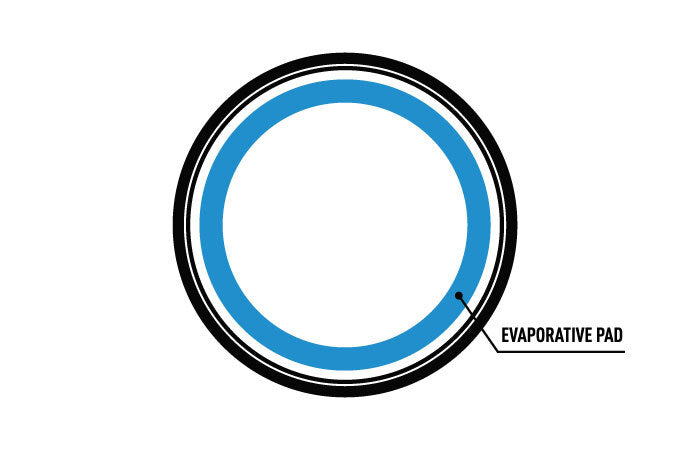
6. Cut two lengths of the screen mesh to about the same size as the evaporative pad, wrap it into a tube shape, and insert it over the pad layer (between the bucket wall and the pad), like this:

7. Cut a hole in the top of the bucket lid, sized to the diameter of your table fan, minus about a quarter inch.
8. Drop the pump with attached plug and tubing into the bucket. Run the tubing around the diameter of the pump once, then feed the rest of it into the bucket and clamp it off.
9. Using a pushpin, poke holes about an inch apart along the length of the tubing.
Now, just mount the table fan into the lid with the fan facing out, attach the pump and the fan to a solar panel or 20 mAh solar power bank, and turn it on.
Thanks to YouTuber desertsun02 who came up with this genius idea! Watch him put the entire thing together from scratch here.
A word of warning: the unit can mold quickly if not properly cleaned after uses.
Instead of Trying to Keep All Rooms Cool, Focus on One
Now, between three layers of protection on your windows and an off-grid swamp cooler, you’ve got everything you need to keep yourself cool for days or even longer.
To maximize efficiency, we suggest focusing on cooling a small space. A master bedroom (with a bathroom) would be a great spot for this. Cool the rest of the house as best you can but spend most of your time in that optimally cooled space.
Open Doors and Windows at Night
Depending on where you live, there may be some benefit to opening the windows at night. This assumes that your storm windows are mounted on the exterior of your home. It will also require you to remove some of the foil from your windows. No worries! You can place them right back on when the sun comes up.
When All Else Fails, Know the Signs
Along with your preps, you should also educate yourself of the signs of heat illness.
There are two stages of heat-related illness: heat exhaustion and heat stroke. You can recover from heat exhaustion within 30 minutes if you cool down. Heatstroke, on the other hand, can be fatal.
Signs of heat exhaustion include sweating profusely, dizziness and headaches, cramps, pale and clammy skin, nausea, tiredness, and fainting.
According to the Mayo Clinic, the signs of heatstroke include:
- High body temperature (of 104° F obtained with a rectal thermometer)
- Confusion, agitation, slurred speech, irritability, and delirium
- Seizures and coma
- Alteration in sweating (skin hot and dry or slightly moist)
- Nausea and vomiting
- Red, flushed skin
- Rapid, shallow breathing
- Racing heart rate
- Headache
First Aid
If you or someone you know suffers the symptoms of heat stroke, call 9-11 and get help immediately. Know first aid techniques for dehydration.
If you’re in a disaster situation without help, move the person to a cool, shady place. Remove as much of their clothing as you can and apply ice and water to their body. Focus on cooling their head, neck, and joint areas.
8 comments
Jim S
I live on the 4th floor of a apartment building each apartment has a small balcony thats screened in it happens There is a 3 story ledge 40 feet across the parking lot from MY apartment north and the parking area is about 40 vehicles across ( westward) to the 2nd of 3 similar buildings Between 3 and 8 pm the sun blazes in So I knew well enough to use Black out curtains, I just found a man made rollup blind and placing it across the screen reduced the afternoon sun temp increase by 25-30 degrees simple slatted rollup style plastic blind brilliant !!!
Rebel
Just a couple of thoughts before I even make it this weekend. Can’t wait!
It can easily be off grid as one might have a solar powered generator to plug it in to. Eh?
Number two, the theory is to PREPARE ahead of a disaster, such as constructing or accumulating before you need items.
Rich
Fill the the bucket with frozen liter water bottles & skip swamp cooler
Mike M
An even more effective way of using the aluminum foil is to put it on the inside of the storm window. That will block the heat further away from the inside air and thus make it a bit cooler. It will also cut out all of the natural light, so you will have to use electricity, lanterns or candles inside for everyday movement. Alternatively, you could cut a small rectangle out of the middle of the foil at eye height which would allow you to look out the window, but also allow some light to dimly illuminate the inside during the day.
Colleen
Can we use those emergency blankets on the windows to deflect heat?
Jeniffer
Uhm- this can’t be right…
First of all- it is not little.“Now that you’ve taken steps to keep heat out, here’s a crafty little device anyone can build to create your own cold air, completely off grid.”
*Secondly, if you need an electric pump for the evaporative cooler (which many of us have built in to our homes with centralized duct work, out west) how can that be “COMPLETELY OFF GRID”?
Erika
Instead of foil, we put the thicker stuff that is marketed as insulation. You can get it at Lowes or Home Depot. It like the stuff you put in your windshield.
BUT – Do NOT put it on the inside of the glass, but rather on the OUTSIDE. why? Because when it’s on the inside, the heat gets immediately redirected right back through the glass. This heats the windows too much and can ruin the seal that holds the gas between the layers of glass. Besides, that keeps that extra heat from even getting to the glass, and that will work better anyway. Stay cool!
Trevor
It’s not exactly “completely off grid” if power tools are required to make it. :)
And there should be a note at the beginning that it will only operate “off grid” if you have the means to power it with solar energy (which doesn’t work well without sunlight unless there are also sufficient batteries involved).